
This TR1 post-installed anchors inspection NYC guide focuses on the field coordination questions that come before a site visit: which approved documents define the work, what scope is assigned, when the anchor area will be visible, and who needs access. The goal is a clear TR1 request and project record, not a substitute for engineering design or a general anchor-testing guide.
For masonry anchor scope, review the TR-1 masonry inspection service
What Should a TR1 Coordination Request Establish?
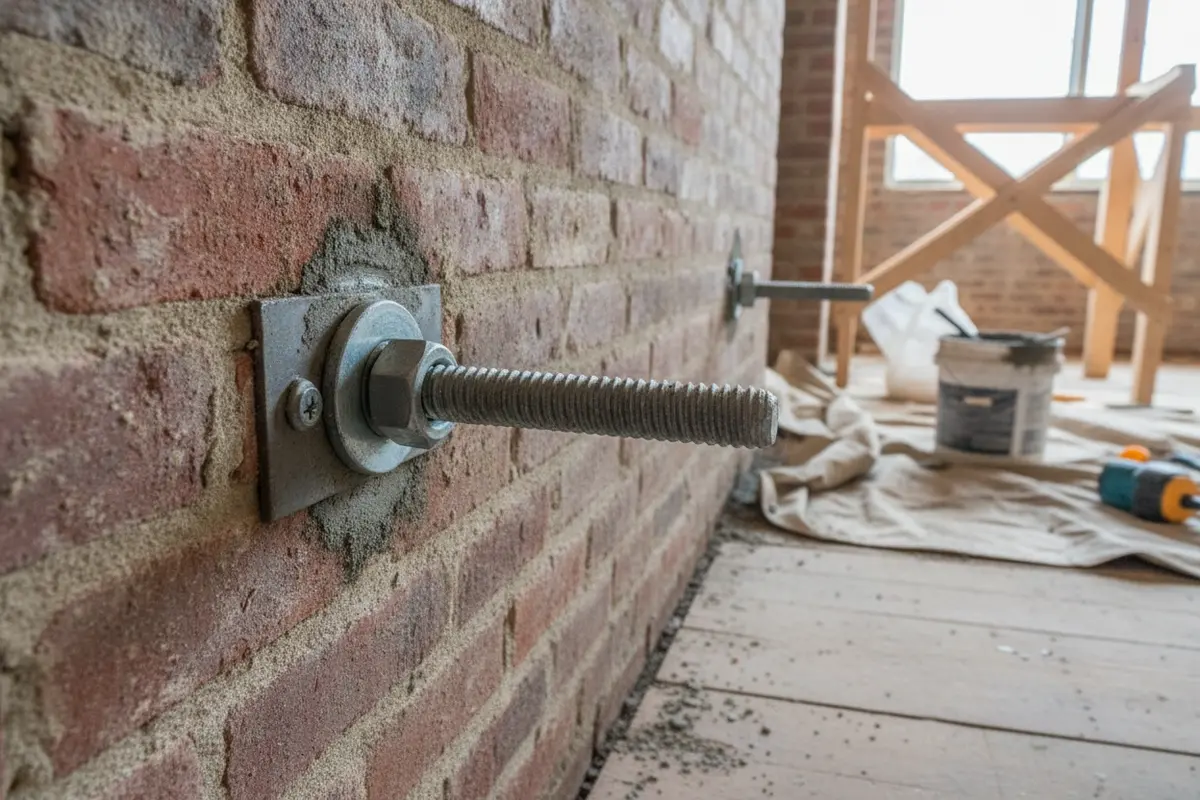
Post-installed anchors are installed into hardened concrete or masonry rather than being cast into the material as part of its original placement. They may connect equipment, framing, supports, or other building components to an existing substrate. For this article, that definition is only the starting point. The useful TR1 question is how the field request ties the anchor work to the approved project scope.
The design professional determines the intended connection, anchor type and placement, and design criteria. The special inspection agency performs the assigned code-related verification; it does not replace engineering design, product approval, or the installer’s responsibility to follow approved instructions. The project team should therefore document who established the requirement, which drawing or schedule controls, and what the inspector is being asked to observe.
The existing TR4 anchor-inspection guide covers the broader anchor-inspection and testing context. This narrower TR1 guide stays with document handoff, scope confirmation, field access, and recordkeeping. When the drawings or schedule are unclear, ask the registered design professional (RDP) or filing team to identify the requirement before ordering or scheduling an inspection.
Takeaway: A useful TR1 request connects the anchor work to the approved documents, assigned responsibility, visible field conditions, and a record of what was inspected.
How Does TR1 Post-Installed Anchors Inspection NYC Coordination Work?
NYC code provisions and project bulletins provide the regulatory context, but the approved filing and inspection schedule still determine what a particular team must coordinate. The current New York City Building Code Chapter 17 and Buildings Bulletin 2016-005 are useful references for the subject, not a replacement for confirming the code edition and assigned scope on the job. Teams should avoid converting a general code reference into a universal procedure for every anchor.
For masonry work, NYC Department of Buildings Buildings Bulletin 2016-005 states that installation of post-installed anchors in masonry is subject to special inspections under the cited Building Code provision. The bulletin is useful context, but teams should still verify the code edition and requirements applicable to their project. See the NYC Buildings Bulletin 2016-005 on post-installed anchors in masonry and the 2022 NYC Building Code Chapter 17 on special inspections.
The most practical starting point is the approved project paperwork. Look for the special inspection schedule or statement, structural details, notes about anchor installation, and the stated material and use. A shop drawing or product submittal may also help explain the specified system, but it does not independently establish the project’s inspection obligation. If the documents conflict or do not name the scope, obtain direction from the design professional responsible for the relevant work.
Takeaway: Use the approved filing and the code edition for the job to establish whether inspection applies and what it covers. Use general references only as a prompt to confirm.
Which project information should you confirm before scheduling?
Collect the information that lets the inspection agency understand the work before the site visit. A clear request can help identify whether the service being ordered matches the project’s actual scope. It also helps prevent a site visit when the installation is not ready or the relevant work has already been concealed.
- Project location: Provide the site address, borough, and a useful on-site contact for access and coordination.
- Filing context: Identify the permit or project reference and share the applicable approved drawings or inspection schedule.
- Anchor substrate: State whether the anchors are installed in concrete, masonry, or another material as shown in the project documents.
- Anchor system: Provide the specified anchor type and product information available in the approved submittal. Do not substitute a different product based only on a field preference.
- Installation location: Mark the relevant area on a plan or detail and explain what component the anchors support.
- Work status: Say whether installation is planned, in progress, or complete, and whether the anchors remain visible and accessible.
- Inspection direction: Include any written clarification from the RDP or filing team if the inspection scope is uncertain.
These are coordination details, not a substitute for the project’s official requirements. For additional general context about NYC TR1 responsibilities, consult the TR1 and special inspection FAQs. AKS Architectural and Engineering Services LLP operates the EZTR1 assumed name; share enough project information for the agency to direct the request to the relevant service.
Use the current, approved drawing set rather than an earlier sketch or a marked-up copy whose status is unclear. If the submittal identifies a specific anchor but the field team proposes a substitute, include the written design direction that resolves the difference. This helps everyone refer to the same basis for the inspection and reduces the chance that the field visit is used to settle a design question.
It is also useful to separate documents that explain the work from records that establish project approval. Product literature can describe an anchor system, but it does not by itself show that the specific product and installation are approved for this project. The design and filing team should identify which documents are controlling and whether a revised detail or formal clarification is needed.
Takeaway: A location, approved scope, substrate, anchor information, and clear work status give the inspection team a useful basis for confirming the next step.
Inspection, Engineering, and Installation Responsibilities
These roles work together, but they are not interchangeable. Confusing them can leave the project team expecting an inspector to make a design decision or to approve a field change that belongs with the design professional.
- Design professional: Establishes the connection design and applicable criteria, reviews design questions, and directs changes to the approved design.
- Installer or contractor: Performs installation in accordance with the approved documents and applicable product instructions, keeps the work accessible as needed, and coordinates the inspection request.
- Special inspection agency: Performs the assigned inspection and documents results within its scope. Inspection does not take over the design professional’s role or certify unrelated work.
- Owner or project manager: Helps coordinate the project team, access, schedule, and required records so the work can be inspected at the appropriate point.
If field conditions differ from the drawings, for example, the base material differs from what the detail shows, the specified anchor is unavailable, or a proposed location changes, pause and route the question to the responsible design professional. Do not ask the inspector to select a replacement or infer design intent. Keep any approved clarification or revised detail with the project records.
It can also help to distinguish inspection from testing. The exact verification activities depend on the applicable code, approved documents, and any instructions from the responsible professionals. Do not assume that a proof or load test is always required, or that a test by itself establishes the full inspection scope. Confirm the requirements in writing before planning a test or treating one as a substitute for inspection.
Takeaway: The designer resolves design intent, the contractor installs the approved system, and the special inspection agency verifies only the assigned scope.
What Should Accompany a TR1 Field Request?
The assigned TR1 request should carry enough project context for the inspection team to understand the approved scope and for the site contact to arrange access. This is a coordination handoff, not a second universal site-readiness checklist. Use the project-specific inspection schedule and design-team direction to decide what must be visible and when.
- Identify the visible scope: Mark the anchor locations and state which portion of the approved work is ready for observation. Do not describe an entire project as ready when only one area is available.
- Coordinate safe access: Arrange access to the work area and identify site rules, sign-in needs, tenant hours, deliveries, and restrictions before the scheduled time.
- Have current documents: Make the applicable detail, schedule, approved product information, and written clarifications available to the people coordinating the visit.
- Identify the exact locations: Show the inspector where the anchor work is located and what scope is ready. For a multi-area project, distinguish completed, active, and not-yet-installed work.
- Coordinate the right timing: Schedule while the relevant work can still be observed, in line with the project documents and applicable inspection requirements.
- Record follow-up: Route questions, corrections, and design clarifications to the appropriate party and retain the resulting records with the project file.
This handoff list is for coordination, not an official acceptance checklist. The project-specific inspection schedule and direction from the design team control. If the work is already concealed, do not assume a later visit can verify the original installation. Ask the design professional and inspection agency how to proceed before opening or altering finished work.
Takeaway: Confirm access, visibility, documents, and timing before the crew is ready for inspection, not after the anchor area is closed.
Comparing Anchor Conditions and Coordination Needs
The table below is a coordination aid. It does not decide whether a particular installation requires inspection or prescribe a test. Use the project’s approved documents and the governing code to confirm the actual scope.
| Project condition | Information to confirm | Coordination point |
|---|---|---|
| Post-installed anchors in masonry | Approved masonry detail, anchor information, applicable inspection schedule, and code edition | Confirm the applicable masonry inspection scope and keep the installation accessible as directed. |
| Post-installed anchors in concrete | Concrete detail, specified anchor system, approved product information, and assigned code provisions | Ask the design or filing team to identify the inspection requirements for this project. |
| Unclear substrate or conflicting documents | Written clarification identifying material, anchor, location, and governing detail | Resolve the discrepancy with the responsible design professional before relying on an inspection visit. |
| Work complete but not yet covered | Locations ready, documents at hand, safe access, and inspection timing | Coordinate the visit before the work becomes inaccessible. |
| Work already concealed | Record of what was installed and direction from the design professional and project team | Do not assume a later visual visit or an informal test can replace the required process. |
Anchors can be part of a broader renovation or alteration, so the project may involve other assigned inspections too. Review the complete list rather than treating one anchor detail as the entire filing. The online inspection catalog can help teams navigate available services; confirm the exact product and scope before ordering.
Takeaway: Compare the documented installation condition and readiness, then have the project team confirm the inspection scope before selecting a service.
How do you coordinate a TR1 post-installed anchor inspection?
Once the project team has established the scope, scheduling is a straightforward sequence. The goal is to match the service request to the approved work and reserve a visit when the area is ready.
Before requesting a date, identify the phase of work that will be ready and whether the inspector needs to see the anchors before a later trade proceeds. A general request such as “anchors are installed” may not be enough when several locations or different substrates are involved. Give the site contact a copy of the scope being inspected, and ask the crew to identify the corresponding area on arrival. If the work sequence changes, update the project team rather than assuming the original time slot still matches the installation.
For multi-tenant buildings and small commercial renovations, access can be affected by occupied spaces, tenant hours, deliveries, or restricted work zones. Share those constraints when coordinating access. Keep the anchor area orderly and reachable, but do not alter an installed connection or move stored materials in a way that changes the work. The inspection agency can confirm service coordination details; the contractor remains responsible for making the work available under the project’s requirements.
- Confirm the requirement: Check the approved inspection schedule and ask the RDP or filing team to resolve any ambiguity.
- Match the service: Use the inspection description that corresponds to the material and work. If a listed service does not clearly match, contact the agency before placing the order.
- Submit project details: Provide the address, site contact, relevant documents, and requested timing through the appropriate service or contact path.
- Prepare the installation: Ensure the area is ready, accessible, and not covered ahead of the assigned inspection.
- Track the record: Keep inspection documentation with the project file and coordinate any correction or follow-up with the responsible parties.
EZTR1 provides online ordering for inspection services. Use the service ordering and cart page where appropriate, or contact AKS Architectural and Engineering Services LLP when the correct scope is unclear. The company background describes the firm behind the EZTR1 assumed name. Never select a product solely because its title sounds similar; the project documents determine the requirement.
Takeaway: Confirm scope first, order the matching service, prepare visible and accessible work, then retain the inspection record with the project documentation.
For masonry anchor work, review and order the TR-1 masonry inspection service
Frequently Asked Questions
What should a TR1 request say about post-installed anchors?
Identify the project address, approved drawing or inspection-schedule reference, anchor substrate and location, installation status, site contact, access limits, and requested timing. The responsible design professional or filing team must confirm the project requirement when the documents do not make the scope clear.
How should testing questions be handled in a TR1 request?
State the question and route it to the responsible design professional or filing team. Testing and special inspection are different activities, and a test should not be treated as a replacement for the inspection assigned by the project documents or code. This guide does not prescribe a testing procedure.
What if the anchor work is hidden before the inspector arrives?
Tell the contractor, design professional, and inspection agency promptly. Do not assume that a later visit can verify concealed installation or that opening the work is automatically the right remedy. The design professional and project team should determine the appropriate next step and document it.
Can the inspector approve a different anchor if the specified one is unavailable?
The inspector does not replace the design professional’s role in selecting or approving a design change. Send the proposed substitution to the responsible design professional and obtain direction through the project’s formal process before installing it.
What should I send when asking about the correct inspection service?
Share the project address, the applicable approved detail and inspection schedule, the anchor type and substrate, the installation status, and the requested timing. If the project documents do not make the scope clear, include the design professional’s written clarification.
Takeaway: Confirm the project-specific requirement and resolve design questions before installation is covered so the team can coordinate the assigned inspection and keep a clear record.
Leave a Reply